GEAR REPAIR – SEWING A PATCH
Gear repair, specifically sewing a patch, is a common and essential skill for maintaining and extending the life of outdoor gear such as tents, backpacks, and clothing. Sewing a patch involves using a needle and thread to mend tears, holes, or wear and tear in the fabric. It requires precision, patience, and attention to detail to ensure the patch is securely attached and the gear is restored to its original functionality. Sewing a patch can be a cost-effective way to prolong the lifespan of outdoor gear and prevent the need for expensive replacements. It is a valuable skill for outdoor enthusiasts and DIYers alike.

Gear repair, specifically sewing a patch, is an essential skill for anyone who enjoys outdoor activities such as hiking, camping, and backpacking. Whether it's a tear in a tent, a hole in a sleeping bag, or a rip in a backpack, being able to repair gear on the go can save a trip and prevent the need for costly replacements. Sewing a patch onto gear requires some basic sewing skills and the right materials, but with a little practice, it can be a relatively simple and effective way to extend the life of your outdoor gear.
The first step in sewing a patch onto gear is to assess the damage and determine the best type of patch to use. For small tears and holes, a simple fabric patch may be all that's needed, while larger tears or damage to heavy-duty gear may require a more robust repair with a heavier fabric or specialized patching material. Once the type of patch needed has been determined, the next step is to gather the necessary materials and tools. This typically includes the patch material, a needle and thread, scissors, and a thimble to protect your fingers while sewing through tough fabrics.
When it comes to choosing a patch material, it's important to select a fabric that is similar in weight and durability to the gear being repaired. For example, a lightweight nylon patch may be suitable for repairing a tear in a tent, while a heavier canvas or Cordura patch may be needed for a backpack or sleeping bag. In addition to matching the weight and durability of the gear, it's also important to choose a patch material that is compatible with the gear's existing fabric. This means selecting a patch fabric that will bond well with the existing material and provide a strong, long-lasting repair.
Once the patch material has been selected, the next step is to prepare the gear for repair. This typically involves cleaning the damaged area and trimming any loose threads or frayed edges to create a clean, flat surface for the patch to adhere to. Depending on the type of gear being repaired, it may also be necessary to apply a patching adhesive or sealant to help the patch bond securely to the gear. Once the gear is prepared, it's time to cut the patch material to the appropriate size and shape. For best results, the patch should be slightly larger than the damaged area, allowing for a secure bond and ensuring that the entire damaged area is covered.
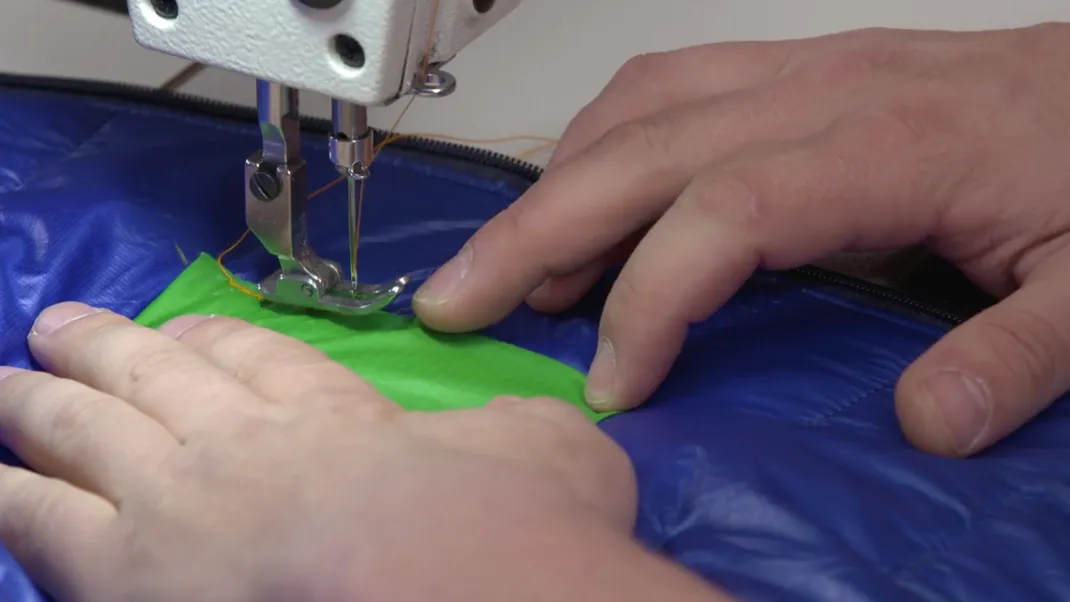
With the patch material cut to size, the next step is to sew the patch onto the gear. This typically involves using a sturdy needle and heavy-duty thread to create a strong, secure bond between the patch and the gear. Depending on the size and location of the patch, it may be necessary to use a thimble to help push the needle through the tough fabric, and a pair of pliers to help pull the needle through especially thick or resistant material. When sewing the patch onto the gear, it's important to use a strong, secure stitch that will hold up to the rigors of outdoor use. This may involve using a simple running stitch, a backstitch, or a patching stitch, depending on the type of gear being repaired and the specific needs of the repair.
Once the patch has been sewn onto the gear, the final step is to secure the edges of the patch to prevent fraying and ensure a neat, professional-looking repair. This may involve using a whip stitch or a blanket stitch around the edges of the patch, or applying a seam sealant or adhesive to create a strong, waterproof bond. With the patch securely in place and the edges neatly finished, the gear repair is complete, and the gear is ready to be used again with confidence.
In addition to repairing damaged gear, sewing a patch onto outdoor gear can also be a creative and personalized way to customize and enhance gear. By selecting a patch material in a fun color or pattern, or adding decorative stitching or embroidery, outdoor enthusiasts can add a personal touch to their gear and make it uniquely their own. This can also be a fun and rewarding way to extend the life of well-loved gear, creating a sense of pride and satisfaction in repairing and maintaining outdoor equipment.
In conclusion, gear repair, specifically sewing a patch, is an important skill for anyone who enjoys outdoor activities. Whether it's a small tear in a tent or a large rip in a backpack, being able to repair gear on the go can save a trip and prevent the need for costly replacements. By selecting the right patch material, preparing the gear for repair, and sewing the patch onto the gear with a strong, secure stitch, outdoor enthusiasts can extend the life of their gear and continue to enjoy their favorite activities with confidence. With a little practice and the right materials, sewing a patch onto outdoor gear can be a simple and effective way to keep gear in top condition and ready for adventure.


